Building a bicycle trailer.
Hello there peoples, well I have been getting stuck in and the project is almost finished, it seems like a year instead of just over a month since I started experimenting with those sink/shower splash boards knocking all that plaster off the back of em and now after abandoning the whole idea of a sidecar because of the width I am making it into a trailer. Well I am almost there and here are my latest pictures of my handiwork. I am rather pleased with myself; though I don't know what the neighbours will think when I hit the road with it as most of em have posh cars I live in a comfortably off neighbourhood, Not rich myself it's just that me and my June were widowed so when we met we sold our houses pooled the cash together and bought this place. Ha-hum I can lower the tone if I want at my age of 75. Better than drooling over a plate in a nursing home; there but for the grace of god go I; keep active is my motto, I have lost 8lb in weight doing this project; must be all that hammering and sawing; the neighbours have been pumping me saying how busy it sounds over my fence. I fob em off with; yes I love keeping busy making things, they look at me expecting more but all they get is 'see ye!' as I turn and walk away; Well I aren't telling em, just wait till they see it.
For you my readers I will show you that I am almost there.
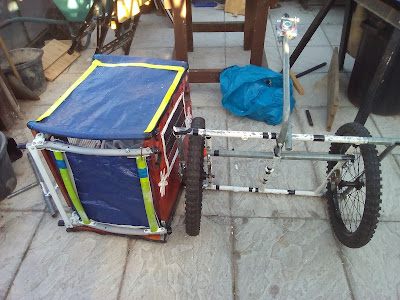
Here is the completed box and frame. Ready for painting the frame today as I put it together yesterday.
This picture shows how I joined the tubing together for the wheel housing before pop riveting and sawing off to trim it.

Here is the end view to make it clear.

Here it is after trimming off with a hacksaw.


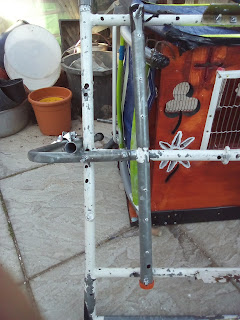
Here -just above the wheels- you will see that I have put a top from a yogurt drink to protect people from the rough ends of tubing and to keep the rain from seeping inside the tubes and rusting them, I have also put black electrical tape on the holes that I drilled for the original designs of first a wide side car then a narrower sidecar and finally a trailer . Plus there were some drill holes where the welders needed the heat to escape when they welded the original climbing frame; I think that is what they are for, some welders who are reading this with an idea to get some tubing and make their own from scratch could put me right; I don't mind, you don't learn anything unless you listen to others; even at my age.
 This is the underneath showing where I have bolted the Bar to the frame and pop riveted 3 sleeves on with a tee-piece. The Tee piece weld isn't square, that is how it was made but it won't make a difference to the strength and the look doesn't matter as it will be under the trailer out of sight.
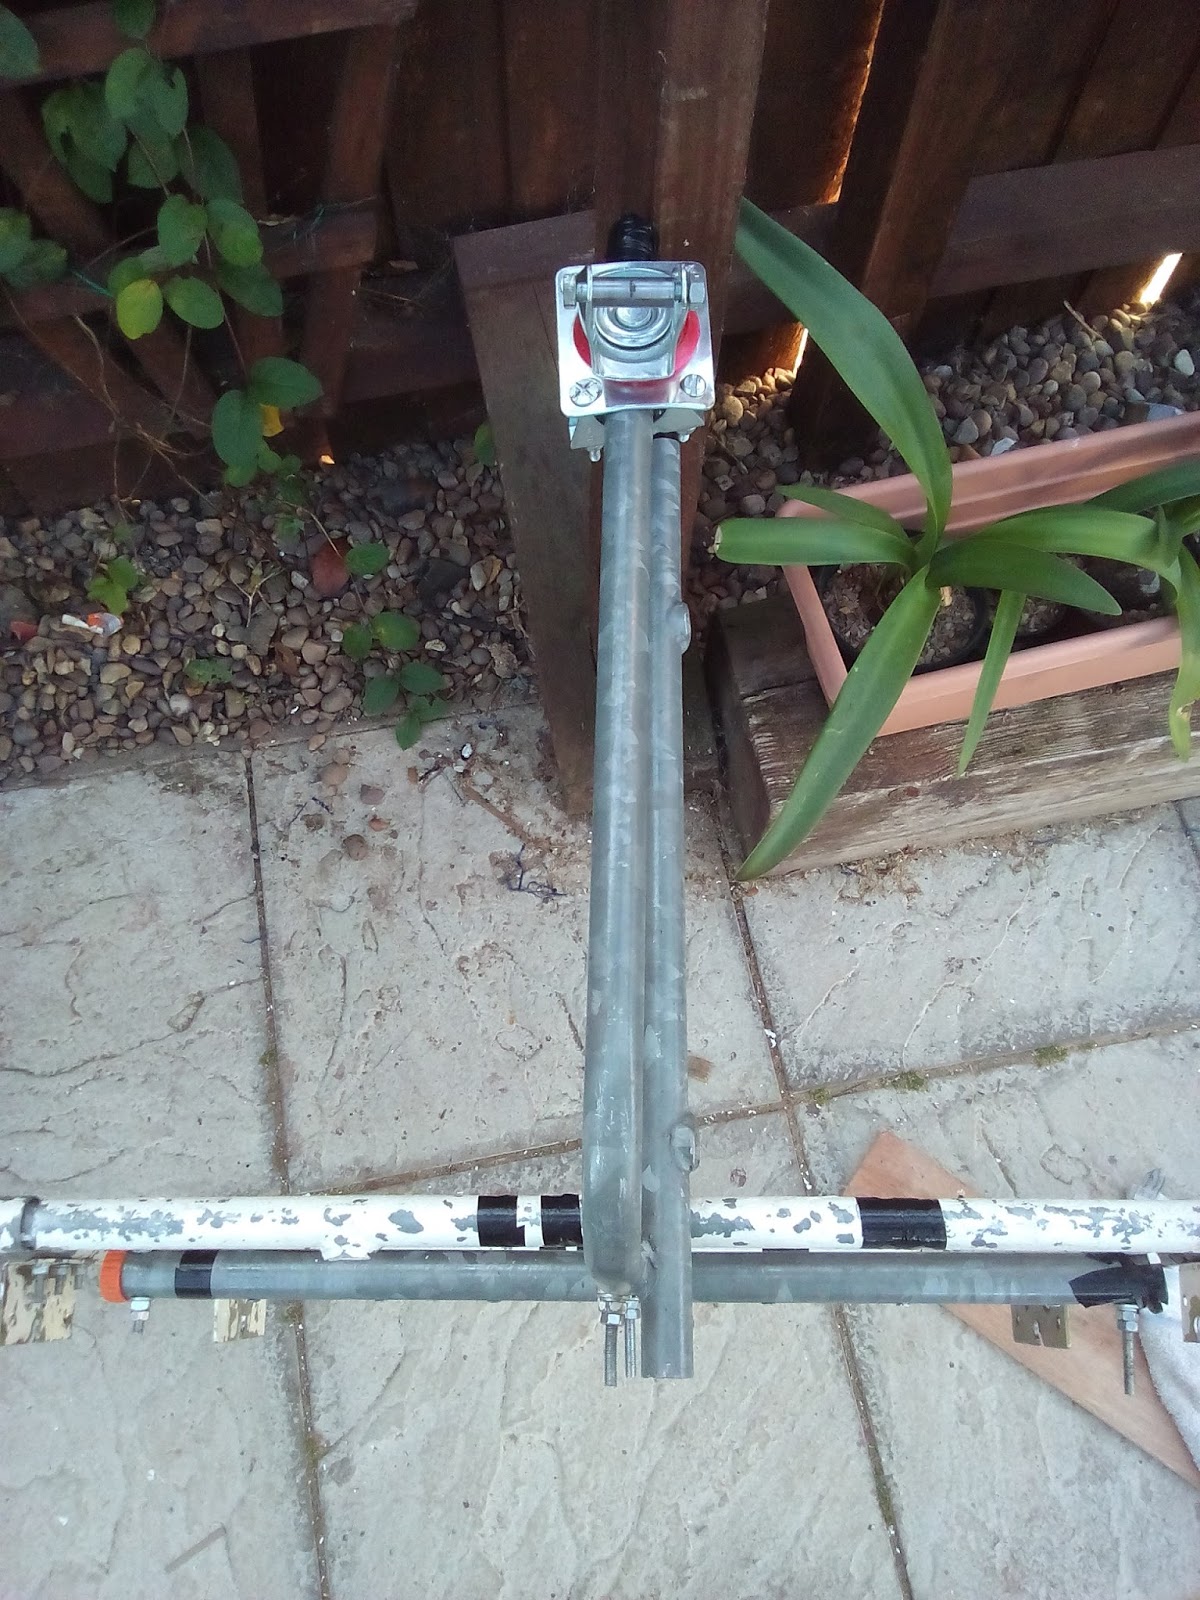
Here is the upstand again, it doesn't look square but the tubes on the fender that was on the original climbing platform were built like that. However, the roller wheel holder is in the center of the trailer and though the square part that is bolted on looks lopsided it makes no difference as the bike will lean and the part holding the bar will hang down ... I hope, that is why I am doing a dummy run without the box or the dog in tow; lets hope I don't look the dummy. When it spins over on its side and

 Here is the new lighter door.

For you my readers I will show you that I am almost there.
Here is the completed box and frame. Ready for painting the frame today as I put it together yesterday.

This picture shows how I joined the tubing together for the wheel housing before pop riveting and sawing off to trim it.

Here is the end view to make it clear.


Here is the up stand for the tow bar, as I said in my last post I got the height from frame to Bicycle seat stem by levelling it off with a spirit level, measuring bike seat to floor and subtracting the distance from frame to floor so that I knew how high it was from seat stem to frame. The tow bar will go into the space where the wheel used to be. I am using an idea I got from pintrest and u-tube I just bolted a castor wheel straight onto the upright as high as I need it; or think I need it. The tow bar will slot into the space vacated by the wheel using the same bolt and spacer tube as the one that came with the wheel.


gouges a scrape in the tarmac and buckles a wheel.


Comments
Post a Comment